Shop Jaws Podiatry on Amazon
Podiatrist-formulated foot-care products for fungus, calluses, and cracked heels.
Visit the Jaws Podiatry Store →As an Amazon Associate we earn from qualifying purchases.
Using an electric callus remover safely can transform rough, hardened skin into smoother, more comfortable feet. The key to successfully using an electric callus remover safely lies in proper preparation, gentle technique, and consistent aftercare, ensuring you remove dead skin effectively without causing irritation or injury. This guide will walk you through each step to achieve soft feet with confidence.
What You’ll Need
- Electric Callus Remover: A good quality device with various roller heads. Find a reliable electric callus remover here.
- Foot Bath or Basin: For soaking your feet.
- Warm Water: To soften the skin.
- Mild Soap or Foot Soak: To cleanse and soften the feet.
- Clean Towel: For drying your feet thoroughly.
- Exfoliating Scrub (Optional): To further prepare the skin. Explore foot scrubs.
- Callus Cream: A hydrating cream, preferably with urea, to moisturize and soften calluses after removal. We recommend the Jaws Podiatry 40% Urea Callus Cream + Stainless-Steel File Kit for its effectiveness in maintaining smooth skin.
- Moisturizing Lotion: For daily hydration.
Step-by-Step Guide to Safely Using an Electric Callus Remover
Follow these steps carefully to ensure a safe and effective callus removal experience.
-
Prepare Your Feet
Begin by preparing your feet to optimize the callus removal process. This initial step is crucial for softening the skin, making calluses easier to remove and minimizing the risk of irritation.
- Soak Your Feet: Fill a foot bath or basin with warm (not hot) water and add a mild soap or a specialized foot soak. Submerge your feet for 10-15 minutes. This softens the calluses, preparing them for easier and safer removal.
- Pat Dry Thoroughly: After soaking, remove your feet from the water and pat them completely dry with a clean towel. Electric callus removers are most effective and safest on dry skin. Using them on wet skin can reduce efficacy and potentially cause the device to slip.
-
Inspect Your Feet
Before turning on the device, take a moment to inspect your feet carefully. This step is vital for preventing injury and ensuring you don’t exacerbate existing conditions.
- Check for Wounds or Irritation: Look for any cuts, sores, open wounds, rashes, or areas of inflammation. Never use an electric callus remover on broken or irritated skin. Doing so can introduce bacteria, worsen the injury, and cause significant pain.
- Identify Callus Areas: Pinpoint the specific areas where calluses are present. These are typically on the heels, balls of the feet, and sides of the toes where friction and pressure are most common. Avoid using the device on healthy, non-callused skin.
-
Choose the Right Roller Head
Most electric callus removers come with interchangeable roller heads of varying coarseness. Selecting the appropriate head is key to safe and effective removal.
- Start with a Finer Head: If your calluses are mild or you’re new to using the device, begin with a finer-grit roller head. This allows for gentle exfoliation and helps you gauge your skin’s sensitivity.
- Progress to Coarser (If Needed): For thicker, more stubborn calluses, you may need to switch to a coarser roller head. However, always proceed with caution and monitor your skin’s reaction closely.
-
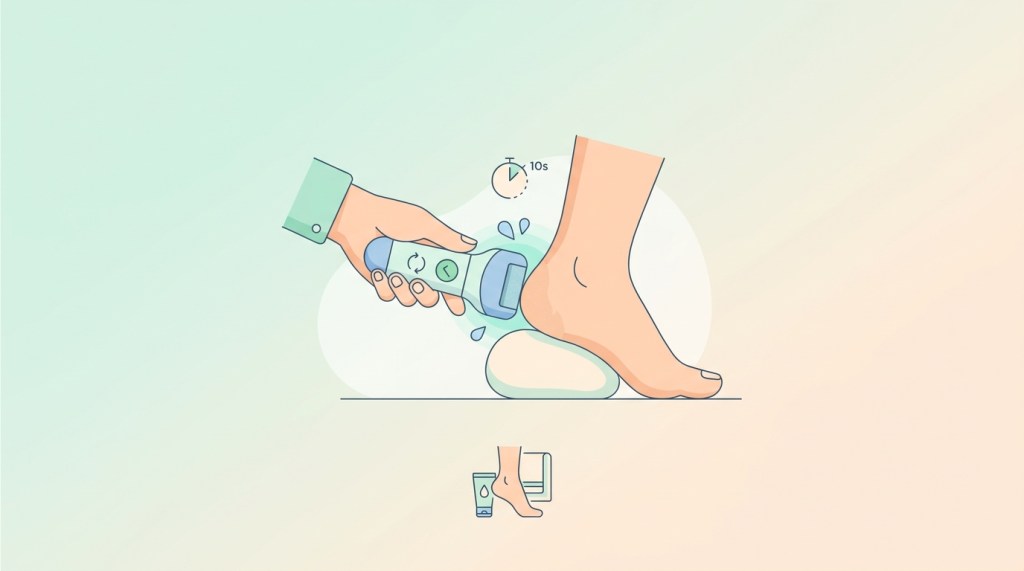
Begin Callus Removal
Now, it’s time to use the electric callus remover. This is where technique and attentiveness are paramount to using an electric callus remover safely.
- Turn On the Device: Switch on your electric callus remover. Many devices have multiple speed settings; start with a lower speed to maintain better control and prevent over-exfoliation.
- Apply Gentle Pressure: Lightly press the rotating roller head against the callused area. The goal is to gently abrade the dead skin, not to grind it away aggressively. Let the device do the work; excessive pressure is unnecessary and can lead to irritation or injury.
- Use Short, Controlled Strokes: Move the device in short, back-and-forth or circular motions over the callus. Avoid holding it in one spot for too long, as this can generate heat and cause friction burns or excessive skin removal.
- Monitor Your Skin: Continuously check the treated area. You’ll see fine white powder – this is the dead skin being removed. Stop immediately if you feel any discomfort, pain, burning, or if the skin starts to look red or raw.
- Remove Gradually: It’s better to remove a little bit of callus over several sessions than to try and remove it all at once. Over-filing can lead to tender, sensitive skin, and even cause the callus to return thicker as a protective response. Aim for a smooth, even texture, not completely bare skin.
-
Clean and Hydrate
After you’ve achieved the desired smoothness, proper aftercare is essential for maintaining soft, healthy feet and preventing calluses from reforming quickly.
- Rinse Your Feet: Once you’re satisfied with the results, rinse your feet thoroughly with warm water to wash away any remaining dead skin particles.
- Pat Dry: Gently pat your feet dry with a clean towel.
- Apply Callus Cream: Immediately apply a generous amount of a high-quality callus cream, such as the Jaws Podiatry 40% Urea Callus Cream. Urea is a powerful humectant and keratolytic agent that helps to deeply moisturize, soften, and gently exfoliate rough skin, prolonging the smoothness achieved by the remover. Massage it in until fully absorbed.
- Regular Moisturizing: Make daily moisturizing a habit, especially after showering or bathing. Consistent hydration is key to preventing calluses from hardening and cracking again.
-
Clean Your Device
Maintaining your electric callus remover’s hygiene is crucial for its longevity and for preventing bacterial growth.
- Remove Roller Head: Most devices allow you to easily detach the roller head.
- Rinse and Clean: Rinse the roller head under running water to remove skin debris. Many are washable, but always check your device’s manual for specific cleaning instructions. Some may require a small brush.
- Allow to Air Dry: Let the roller head air dry completely before reattaching it or storing the device.
- Store Properly: Store your electric callus remover in a clean, dry place.
Shop Jaws Podiatry on Amazon
Podiatrist-formulated foot-care products for fungus, calluses, and cracked heels.
Visit the Jaws Podiatry Store →As an Amazon Associate we earn from qualifying purchases.
Mistakes to Avoid When Using an Electric Callus Remover
To ensure you’re using an electric callus remover safely and effectively, be aware of these common pitfalls:
- Over-Exfoliating: This is perhaps the most common mistake. Removing too much skin at once can leave your feet tender, sensitive, and prone to irritation or even bleeding. It can also trigger the body to produce more callus as a protective response, making the problem worse in the long run.
- Using on Wet Skin: While soaking is good for preparation, electric callus removers are designed for dry skin. Using them on wet skin reduces their effectiveness and can cause the device to drag or slip, potentially leading to injury.
- Applying Too Much Pressure: Let the device do the work. Pressing down too hard can cause friction burns, irritate the skin, and damage the device.
- Ignoring Pain or Discomfort: If you feel any pain, burning, or excessive heat, stop immediately. These are signs that you’re either applying too much pressure, over-exfoliating, or the device is not suitable for your skin condition.
- Using on Broken or Irritated Skin: Never use the remover on cuts, sores, blisters, rashes, or any broken skin. This can introduce infection and worsen the condition.
- Neglecting Aftercare: Skipping moisturizing after callus removal allows the skin to dry out quickly, making calluses more likely to return faster. Consistent hydration is key to maintaining smooth feet.
- Infrequent Cleaning of the Device: A dirty device can harbor bacteria and reduce its effectiveness. Always clean the roller head after each use.
Safety Note: When to See a Podiatrist
While electric callus removers can be a great tool for managing common calluses, there are important safety considerations. Individuals with certain health conditions should exercise extreme caution or avoid DIY callus removal altogether.
If you have diabetes, neuropathy (nerve damage), poor circulation, or any other condition that affects foot health or wound healing, you should consult a podiatrist before using an electric callus remover or any abrasive foot care tool. These conditions can significantly increase your risk of injury, infection, and slow-healing wounds, which can lead to serious complications.
Furthermore, if your calluses are:
- Extremely thick or painful.
- Associated with open sores or signs of infection (redness, swelling, pus).
- Located in unusual areas.
- Persistent despite regular at-home care.
It’s best to seek professional guidance from a podiatrist. They can accurately diagnose the cause of your calluses, safely remove them, and recommend appropriate long-term solutions.
Key Takeaways
- Preparation is Key: Always start with clean, soaked, and thoroughly dry feet before using an electric callus remover.
- Gentle Touch: Use light pressure and short, controlled strokes. Let the device do the work to avoid over-exfoliation and irritation.
- Inspect Your Feet: Never use the device on broken, irritated, or sensitive skin.
- Hydrate Consistently: Follow up every removal session with a good callus cream, like Jaws Podiatry 40% Urea Callus Cream, and moisturize daily to maintain soft skin.
- Know When to Stop: Stop immediately if you feel pain, burning, or see excessive redness. If you have underlying health conditions like diabetes, consult a podiatrist first.
Frequently Asked Questions
How often can I use an electric callus remover?
The frequency depends on the thickness and rate of callus buildup. For most people, using it once every 1-2 weeks is sufficient to maintain smooth feet. If your calluses are very thick, you might start with more frequent, very light sessions, then reduce as your feet improve. Always prioritize your skin’s comfort and avoid over-exfoliation.
Is using an electric callus remover painful?
No, using an electric callus remover should not be painful. If you experience pain, burning, or discomfort, it’s a sign that you are either applying too much pressure, using it for too long in one area, or have removed too much skin. Stop immediately and reassess your technique or consult a podiatrist if pain persists.
Can electric callus removers cause calluses to grow back thicker?
If used improperly, specifically by over-exfoliating and removing too much skin, your body might respond by producing a thicker callus as a protective mechanism. The key is gentle, gradual removal and consistent moisturizing afterward. This helps to prevent the skin from feeling threatened and overcompensating.
What’s the difference between an electric callus remover and a manual foot file?
Both tools remove dead skin, but electric callus removers offer convenience and often more consistent results with less effort. They use a rotating abrasive head, while manual files require manual scrubbing. Electric removers can be easier for those with limited dexterity and tend to be quicker. However, both require careful use to avoid over-exfoliation.
Can I use an electric callus remover on cracked heels?
You can use an electric callus remover on the hardened, callused skin around cracked heels, but you must be extremely cautious. Never use it directly on open cracks, cuts, or bleeding areas. Focus only on the dry, thickened skin. After removal, it’s crucial to follow up with a deeply hydrating and healing cream, such as the Jaws Podiatry 40% Urea Callus Cream, which is excellent for softening and repairing cracked heels. If cracks are deep or painful, consult a podiatrist.


Leave a Reply