Shop Jaws Podiatry on Amazon
Podiatrist-formulated foot-care products for fungus, calluses, and cracked heels.
Visit the Jaws Podiatry Store →As an Amazon Associate we earn from qualifying purchases.
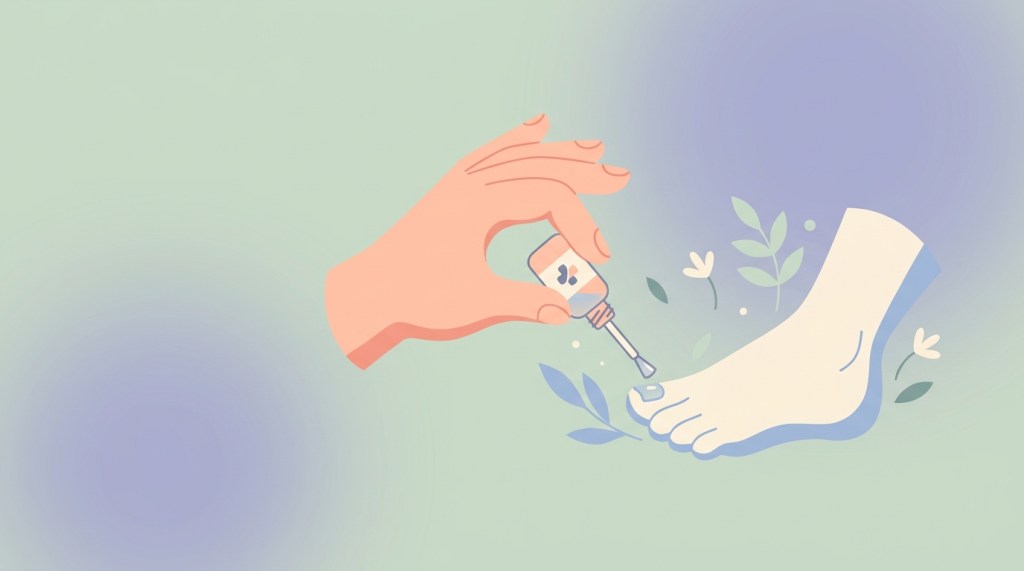
Effectively treating nail fungus requires more than just applying a product; it demands proper preparation, consistent technique, and ongoing hygiene. To apply antifungal nail treatment correctly, begin by thoroughly cleaning and filing the affected nail to improve product penetration. Then, follow the specific instructions for your chosen treatment, ensuring you apply it consistently and for the recommended duration, even after visible improvement, to prevent recurrence. This meticulous approach is key to eradicating the infection and restoring healthy nails.
What You’ll Need
Having the right tools on hand will make the application process smoother and more effective, helping you apply antifungal nail treatment correctly and safely.
- High-Quality Nail Clippers: Look for sharp clippers designed for toenails, which are often thicker than fingernails. Find suitable nail clippers here.
- Disposable Nail Files: Using a new, disposable file each time (or for each affected nail) prevents reinfection. Alternatively, a dedicated file that can be sterilized with rubbing alcohol is acceptable. Browse disposable nail files.
- Antifungal Nail Treatment: This is the core of your treatment. For early signs of nail fungus, a product like Jaws Podiatry’s Undecylenic Acid + Tea Tree Oil Nail Enhancer can be effective. This combines powerful antifungal ingredients with natural extracts to support nail health. Learn more about Jaws Podiatry’s Nail Enhancer. For more advanced cases, your podiatrist might prescribe a stronger topical or oral medication.
- Cotton Swabs or Applicators: For precise application, especially under the nail and on surrounding skin.
- Rubbing Alcohol or Non-Acetone Nail Polish Remover: To clean the nail surface before filing, removing oils or residue.
- Clean Towel: To thoroughly dry your feet and nails.
- Disposable Gloves (Optional but Recommended): To prevent the spread of fungus to your hands or other nails.
Step-by-Step Guide to Applying Antifungal Nail Treatment
Following these steps meticulously will help you apply antifungal nail treatment correctly, maximizing its effectiveness and promoting healthier nails.
Step 1: Gather Your Supplies
Before you begin, lay out all the items listed above. This ensures you have everything within reach and can maintain a sterile process without interruption.
Step 2: Prepare Your Nails and Feet
Proper preparation is crucial for the antifungal treatment to penetrate the nail bed effectively. Without it, the treatment may simply sit on the surface, yielding poor results.
- Cleanse and Dry: Wash your feet thoroughly with soap and water, paying close attention to the affected nails and the skin around them. Dry your feet completely with a clean towel, ensuring no moisture remains, as fungus thrives in damp environments.
- Remove Polish (If Applicable): If you have any nail polish on, remove it completely using a non-acetone remover. Polish can create a barrier that prevents the antifungal treatment from reaching the infection.
- Trim Your Nails: Carefully trim the affected nail straight across, then gently round the edges to prevent ingrown nails. Trim as much of the infected, discolored, or brittle part of the nail as possible without causing discomfort or pain.
- File the Nail Surface: This is a critical step. Using a clean, disposable nail file, gently file down the surface of the affected nail. The goal is to thin the nail slightly, creating a rougher texture that allows the antifungal treatment to penetrate deeper into the nail plate. Be gentle to avoid irritating the nail bed or surrounding skin. Use a separate file for each infected nail, or sterilize your file thoroughly with rubbing alcohol after each use.
Safety Note: If you have diabetes, neuropathy, or poor circulation, consult your podiatrist before performing any self-care involving sharp tools or abrasive filing. Improper technique can lead to serious complications.
Step 3: Apply the Antifungal Treatment
Now that your nails are prepped, it’s time to apply the treatment. Always read the specific instructions on your product’s packaging, as application methods can vary slightly.
- Read Product Instructions: Different treatments may have unique application methods, such as once or twice daily, specific drying times, or instructions for applying under the nail.
- Apply a Thin Layer: Using the product’s applicator or a clean cotton swab, apply a thin, even layer of the antifungal treatment directly to the entire surface of the affected nail.
- Target Under and Around the Nail: Gently push back the cuticle (if recommended by the product) and apply the treatment to the skin directly around the nail (the cuticles and sidewalls). If possible and instructed, use a fine applicator or cotton swab to apply a small amount of treatment underneath the free edge of the nail, where fungus often resides.
- Allow to Dry: Let the treatment air dry completely before putting on socks or shoes. This can take several minutes, depending on the product. Rushing this step can rub off the treatment and reduce its effectiveness.
Step 4: Maintain Hygiene and Consistency
Treating nail fungus is a marathon, not a sprint. Consistency and ongoing hygiene are paramount.
- Clean Tools: Always clean your nail clippers and reusable files with rubbing alcohol after each use. Dispose of single-use files immediately.
- Wash Hands: After applying the treatment, wash your hands thoroughly with soap and water, especially if you didn’t wear gloves.
- Daily Application: Most topical treatments require daily or twice-daily application. Stick to the schedule diligently. Missing applications can prolong the treatment period and allow the fungus to regrow.
- Footwear and Socks: Wear clean, breathable socks daily (cotton or moisture-wicking synthetic materials are best). Opt for shoes made of breathable materials and allow them to air out between uses. Consider antifungal shoe sprays or powders to treat your footwear.
- Patience is Key: Nail fungus treatment takes time, often several months, as the infected nail must grow out and be replaced by healthy nail. Do not stop treatment just because you see improvement; continue until a healthy, clear nail has fully grown out.
Shop Jaws Podiatry on Amazon
Podiatrist-formulated foot-care products for fungus, calluses, and cracked heels.
Visit the Jaws Podiatry Store →As an Amazon Associate we earn from qualifying purchases.
Mistakes to Avoid
Successfully treating nail fungus hinges on avoiding common pitfalls that can hinder progress or even worsen the infection.
- Not Preparing the Nail Properly: Skipping the cleaning, trimming, or filing steps means the antifungal agents can’t reach the fungus effectively. The treatment will likely fail if it just sits on the thick, infected nail surface.
- Inconsistent Application: Antifungal treatments need to be applied regularly and as directed. Missing days allows the fungus to multiply and regain strength, making treatment longer and less effective.
- Stopping Treatment Too Soon: Many people stop treatment once the nail starts looking better. However, microscopic fungal spores can remain. You must continue treatment until a completely healthy, clear nail has grown from the base to the tip, which can take 6-12 months for toenails.
- Ignoring Surrounding Skin: Fungus can spread to the skin around the nail, leading to athlete’s foot. Applying the treatment to the skin around the nail helps prevent this spread and ensures comprehensive treatment.
- Reusing Contaminated Tools: Using the same clippers or files on healthy nails after using them on infected nails, or not sterilizing them properly, is a sure way to spread the infection to other nails or reinfect the treated nail.
- Wearing Non-Breathable Footwear: Tight, non-breathable shoes and synthetic socks create a warm, moist environment perfect for fungal growth. Opt for breathable materials and change socks daily.
- Not Addressing Underlying Causes: If you frequently expose your feet to public showers without protection, wear ill-fitting shoes, or have certain health conditions, the fungus may keep returning unless these factors are addressed.
When to See a Professional
While many mild cases of nail fungus can be managed with over-the-counter treatments, there are situations where professional medical advice is essential.
- No Improvement After Several Weeks: If you’ve been diligently applying an over-the-counter treatment for 4-6 weeks and see no signs of improvement, it’s time to consult a podiatrist.
- Worsening Symptoms: If the infection spreads, the nail becomes more discolored, thicker, painful, or starts to lift from the nail bed, seek professional help.
- Pain or Discomfort: Significant pain, swelling, or redness around the nail indicates a more severe infection that may require prescription medication.
- Underlying Health Conditions: Individuals with diabetes, neuropathy (nerve damage), poor circulation, or a weakened immune system should always consult a podiatrist at the first sign of nail fungus. These conditions can make minor foot problems much more serious and increase the risk of secondary bacterial infections or complications.
- Difficulty with Self-Care: If you have difficulty reaching your feet, trimming your nails, or properly applying treatments due to physical limitations, a podiatrist can provide essential care.
A podiatrist can accurately diagnose the type of fungus, recommend stronger prescription-strength topical or oral medications, or suggest other treatments like laser therapy or surgical removal of the infected nail in severe cases.
Key Takeaways
- Preparation is Paramount: Always clean, trim, and gently file the affected nail to ensure maximum product penetration.
- Consistency is Crucial: Apply the treatment daily as directed, without skipping applications, for the entire recommended duration, often several months.
- Don’t Stop Too Soon: Continue treatment until a completely healthy, clear nail has fully grown out to prevent recurrence.
- Maintain Hygiene: Sterilize tools, wear breathable socks and shoes, and keep feet dry to prevent spreading and reinfection.
- Seek Professional Help When Needed: If over-the-counter treatments fail, symptoms worsen, or if you have underlying health conditions, consult a podiatrist for personalized care.
Frequently Asked Questions
How long does it take for antifungal nail treatment to work?
The time it takes for antifungal nail treatment to work varies significantly depending on the severity of the infection, the specific product used, and individual nail growth rates. Typically, you might start to see some improvement in 4-8 weeks, but complete eradication and the growth of a healthy, clear nail can take 6 to 12 months for toenails, and often longer if the infection is severe. It’s crucial to continue treatment until a healthy nail has fully replaced the infected one.
Can I wear nail polish during treatment?
Generally, it’s best to avoid wearing nail polish on an infected nail during antifungal treatment. Nail polish can create a barrier that prevents the topical medication from penetrating the nail plate, significantly reducing its effectiveness. It can also trap moisture, creating an ideal environment for fungus to thrive. If you must wear polish for a special occasion, opt for a “breathable” polish and remove it as soon as possible, ensuring you resume your antifungal treatment immediately.
What if the treatment doesn’t work?
If you’ve been diligently applying an over-the-counter antifungal treatment for several weeks or months without seeing any improvement, it’s time to consult a podiatrist. They can accurately diagnose the type of fungus, rule out other conditions that mimic nail fungus, and recommend stronger prescription-strength topical medications, oral antifungal drugs, or other advanced treatments like laser therapy. Sometimes, a combination of treatments is necessary for stubborn infections.
How often should I apply antifungal nail treatment?
The frequency of application for antifungal nail treatment depends on the specific product you are using. Most over-the-counter topical treatments recommend daily application, often once or twice a day. It is critical to always read and follow the instructions provided with your specific product for the best results. Consistent application, as directed, is far more important than sporadic, heavy applications.
Are there different types of antifungal nail treatments?
Yes, there are several types of antifungal nail treatments. These include:
- Topical Antifungal Solutions: These are applied directly to the nail and are often the first line of defense for mild to moderate infections. Examples include products with undecylenic acid, like Jaws Podiatry’s Nail Enhancer available here, or other ingredients like clotrimazole or miconazole.
- Prescription Topical Lacquers: These are stronger, medicated nail polishes (e.g., ciclopirox or efinaconazole) applied daily or weekly.
- Oral Antifungal Medications: For more severe or persistent infections, a doctor may prescribe oral medications like terbinafine or itraconazole. These are highly effective but carry potential side effects and require monitoring.
- Laser Treatment: Some podiatrists offer laser therapy to target and destroy the fungus within the nail.
- Surgical Removal: In very severe or painful cases, a podiatrist might recommend temporarily or permanently removing the infected nail.


Leave a Reply